Planning a birthday party and want to add a unique touch? Forget store-bought decorations and dive into a fun, creative project: making your own piñata! Not only is it a fantastic way to personalize your celebration, but it’s also a budget-friendly alternative. Plus, the process itself is a blast, especially if you get the whole family involved. Get ready to unleash your inner artist and create a memorable centerpiece for your fiesta!
In this article, we’ll guide you through the simple steps of crafting your own piñata. We’ll cover everything from gathering the necessary materials to decorating your masterpiece. Whether you’re aiming for a traditional star shape or a quirky custom design, we’ve got you covered. Let’s get started on this exciting DIY adventure and create a piñata that will be the highlight of your birthday party!
Gathering Your Piñata-Making Supplies
Before you begin, it’s crucial to have all the necessary materials within reach. This will make the process smoother and more enjoyable. Here’s a comprehensive list to ensure you’re well-prepared:
- Cardboard Box: A sturdy cardboard box will serve as the base of your piñata. The size depends on how large you want your piñata to be.
- Newspaper: Lots and lots of newspaper! This will be used to create the layers of paper mache.
- Flour and Water: These are the key ingredients for your paper mache paste. You’ll need about 1 cup of flour for every 2 cups of water.
- Crepe Paper or Tissue Paper: Choose vibrant colors to decorate your piñata. Crepe paper streamers are ideal for creating the fringed effect.
- Scissors: Essential for cutting the newspaper and crepe paper.
- Glue or Tape: To secure the layers of paper mache and decorations.
- String or Rope: For hanging your piñata. Make sure it’s strong enough to hold the weight.
- Candy and Small Toys: The most important part! Choose a variety of treats to fill your piñata.
Step-by-Step Guide to Making Your Piñata
Now that you have all your supplies, let’s get down to the actual piñata-making process. Follow these steps carefully to create a sturdy and visually appealing piñata.
1. Prepare the Cardboard Base
Start by shaping your cardboard box into the desired form. You can leave it as a cube, cut and reshape it into a star, or create any other fun design. Secure the edges with tape to maintain the shape.
2. Mix the Paper Mache Paste
In a large bowl, mix the flour and water until you achieve a smooth, glue-like consistency. Ensure there are no lumps. This will be your adhesive for the newspaper layers.
3. Apply the Paper Mache Layers
Tear the newspaper into strips. Dip each strip into the paper mache paste, removing any excess. Apply the strips to the cardboard base, overlapping them to create a strong and even layer. Repeat this process, adding several layers of newspaper. Allow each layer to dry completely before adding the next to prevent mold and ensure durability. Aim for at least 3-4 layers.
4. Create the Opening and Hanging Point
Once the paper mache is completely dry, carefully cut an opening at the top of the piñata, large enough to fill it with candy and toys. Reinforce the area around the opening with extra paper mache. Then, create two small holes on either side of the top and thread a strong string or rope through them, knotting it securely inside to create a hanger.
5. Decorate Your Piñata
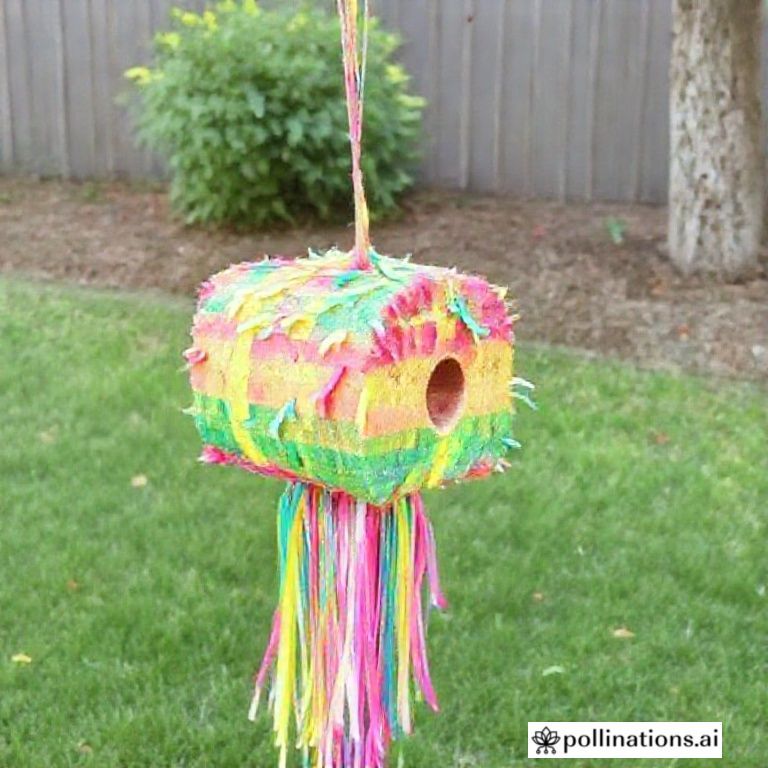
Now comes the fun part! Cut the crepe paper into strips and fringe one side with scissors. Apply glue to the piñata and attach the fringed crepe paper, starting from the bottom and working your way up. Overlap the layers to create a vibrant and textured effect. Get creative with colors and patterns to make your piñata truly unique. You can also add other decorations like glitter, stickers, or paint.
6. Fill and Seal
Once the decorations are complete and the glue is dry, fill your piñata with candy and small toys. Be sure to distribute the treats evenly to ensure a fair game. After filling, cover the opening with a piece of cardboard and secure it with tape and a final layer of paper mache.
Tips for a Perfect Piñata
To ensure your DIY piñata is a smashing success, consider these helpful tips:
- Allow Ample Drying Time: Proper drying is crucial for a sturdy piñata. Allow each layer of paper mache to dry completely, ideally overnight.
- Use Strong String: The string or rope used to hang the piñata should be strong enough to support the weight of the piñata and its contents.
- Get Creative with Decorations: Don’t be afraid to experiment with different colors, textures, and materials. The more creative, the better!
- Involve the Kids: Making a piñata is a fantastic activity for kids. Let them help with tearing the newspaper, applying the paper mache, and decorating.
Conclusion
Making your own piñata for a birthday party is a rewarding and enjoyable experience. Not only do you get a personalized decoration, but you also create lasting memories with family and friends. By following these simple steps and tips, you can create a stunning piñata that will be the highlight of your celebration. So gather your supplies, unleash your creativity, and get ready to have a smashing good time!
If you enjoyed this article, don’t forget to explore more inspiring stories on Life in Mexico!
IMAGE: A brightly lit, cheerful scene depicting a family (parents and two children) gathered around a table, enthusiastically working on a piñata. The piñata is partially decorated with colorful crepe paper. The table is covered with crafting supplies like scissors, glue, bowls of paper mache paste, and piles of newspaper strips. The overall mood is joyful and creative, with warm, inviting colors and a focus on family bonding. The style is realistic and inviting.